How to set up and use a compressor safely
Once you have selected your compressor, here is a quick and easy guide on how to set up and use your new compressor safely.
1. Safety
Before setting up the compressor, remember to wear appropriate PPE such as glasses, ear defenders and safety boots, and avoid wearing loose clothing which could become entangled in the compressor.
2. Unbox the compressor
Unbox the compressor and assemble any wheels, handles and/or accessories as instructed in the manual.
3. Insert oil into the compressor
Remove the oil cap and fill with new oil through the hole until the level needed. Then tighten the oil cap.
When replacing oil always ensure that the compressor is switched off. Once you have completely evacuated the air from the tank, you can then unscrew the oil drain cap from the compression chamber. To avoid an uncontrolled leakage of oil, place a gutter underneath, and collect the oil in a container. Make sure that any used oil and condensate is disposed of in compliance with protection of environment and current legislation.

4. Power on compressor and charge the tank
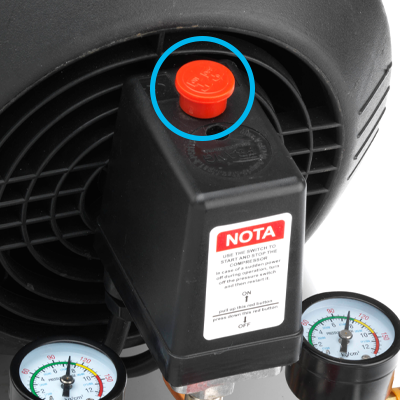
Make sure the switch is “OFF” before connecting the power cord to the grid to avoid the compressor accidentally starting. To power the compressor, pull the power button up and wait until the tank is charged, it will cut off once charged.
5. Connect the air tool hose assembly
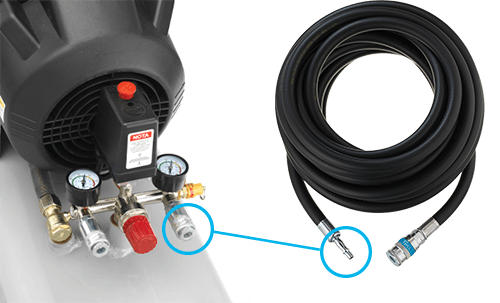
Plug the air tool hose assembly into the couplings on the compressor. PCL compressors are available with either Airflow or XF-Euro couplings, therefore you will need to check and match the hose assembly with the couplings.
6. Connect the relevant tool
Plug the air tool or tyre inflator into the hose assembly.
7. Set the pressure regulator
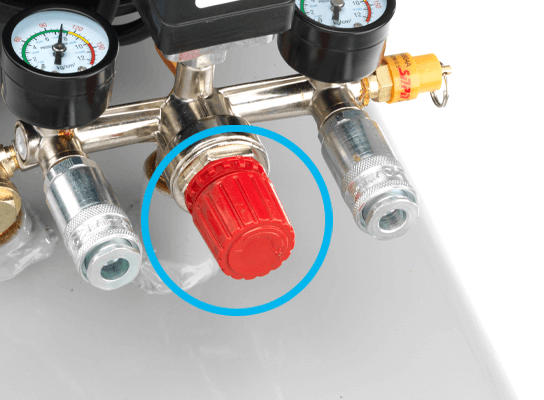
To adjust the working pressure, turn the regulator clockwise to increase the pressure or anti-clockwise to reduce the pressure to the correct working pressure specified in the tool manufacturer’s manual.
It is important to keep an eye on the pressure, if the pressure is beyond its upper limited then this will lead to damage of vital components of the air compressor, and if the regulator is under pressure, there will not be enough pressure to power the tool.
8. Power off compressor
To switch off, the button must be pressed down.

Watch the full demonstration
|
|
|
WARNING! Before any intervention on the machine, disconnect the power supply from the mains and wait until the compressor has cooled completely! |
|
 |
Avoid extension leadsAvoid using extension leads with an air compressor, the voltage drop can cause the motor to overheat which will eventually lead to the compressor motor burning out. We recommend using a longer air hose instead. |
Consider the CFMIf you do plan to run your air tool some distance away from the actual compressor, you must take into consideration that air flow lost through hoses and fittings will result in pressure drops. However, the more CFM the compressor produces, the better your tool will run, even with longer hoses and more fittings. |
|
 |
Drain compressorCompressors should be drained frequently to prevent water from reducing performance. They often fill with water due to moisture content in the air, therefore the compressor has a drain screw located at the lowest part of the receiver to release it. |
 |
Oil compressorRemember to oil your air compressor regularly so it performs correctly. (You do not need to do this with oil-less compressors). |
 |
General cleaningBefore performing any cleaning or maintenance operation completely drain the air tank. Regularly clean the machine housing with a soft cloth, preferably after each use. If the dirt does not come off used a soft cloth moistened with soapy water. Never use solvents such as petrol, alcohol, ammonia, etc, as these solvents may damage the plastic parts. |
 |
Clean the Air filterThe air filter prevents dust and dirt intake. It is necessary to clean the filter after no more than 100 hours of operation. A clogged air filter greatly reduces compressor power. |


